Vinyl flooring is a popular choice for homeowners due to its durability, affordability, and versatility. However, like any flooring material, it can suffer from scratches and dents over time. Whether it’s from moving furniture, pet claws, or everyday wear and tear, knowing how to repair these imperfections can help maintain the aesthetic appeal and longevity of your vinyl floors. In this comprehensive guide, we’ll explore step-by-step methods to repair scratches and dents in vinyl flooring, ensuring your floors look as good as new.
Understanding Vinyl Flooring
Before diving into the repair process, it’s essential to understand the types of vinyl flooring and the common causes of damage. Vinyl flooring comes in two main types: sheet vinyl and luxury vinyl tiles (LVT) or planks (LVP). Both types are designed to be resilient, but they can still be susceptible to damage.
Common Causes of Scratches and Dents
Heavy Furniture: Moving heavy furniture without proper protection can cause scratches or dents.
Pet Claws: Pets with sharp claws can leave noticeable scratches on vinyl floors.
Foot Traffic: High-traffic areas are more prone to wear and tear.
Dropped Objects: Heavy or sharp objects dropped on the floor can create dents or gouges.
Tools and Materials Needed for Repair
To repair scratches and dents in vinyl flooring, you will need specific tools and materials. Here is a list of essentials:
- Vinyl floor repair kit
- Cleaning solution
- Soft cloth
- Putty knife
- Heat gun or hairdryer
- Sandpaper
- Adhesive
- Utility knife
Step-by-Step Guide to Repairing Scratches
Step 1: Clean the Affected Area
Before attempting any repairs, it’s crucial to clean the scratched area thoroughly. Use a gentle cleaning solution and a soft cloth to remove any dirt, dust, or debris. This step ensures that no particles interfere with the repair process.
Step 2: Assess the Damage
Examine the scratch to determine its depth. Light surface scratches can often be repaired with simple methods, while deeper scratches might require more extensive repairs.
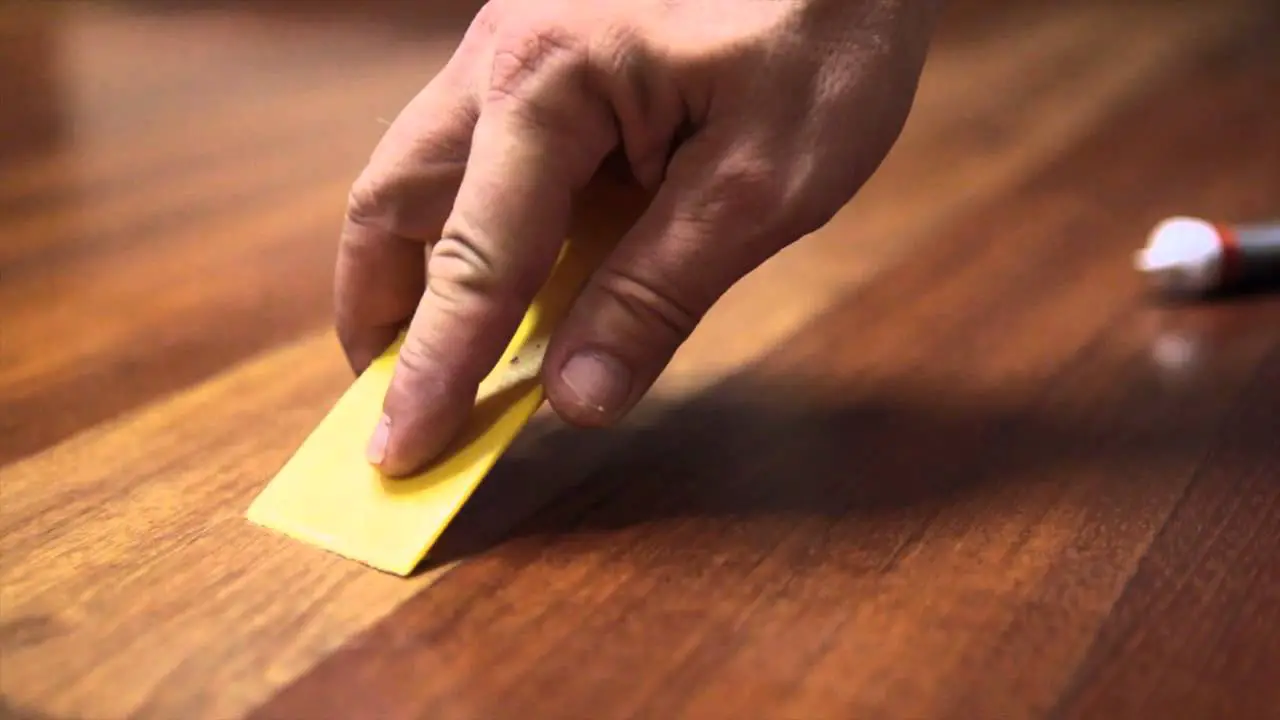
Step 3: Use a Vinyl Floor Repair Kit
For light scratches, a vinyl floor repair kit can be very effective. These kits usually contain a variety of colored putties or waxes that can be mixed to match the color of your floor. Follow the instructions on the kit to apply the putty to the scratch. Use a putty knife to smooth the surface and remove any excess material.
Step 4: Apply Heat
For deeper scratches, applying heat can help. Use a heat gun or hairdryer to warm the area around the scratch. This makes the vinyl more pliable and easier to manipulate. Once heated, use a putty knife to gently work the vinyl back into place. Be careful not to overheat, as this can damage the flooring.
Step 5: Sand and Smooth
After the putty has set, use fine-grit sandpaper to smooth the repaired area. Sand lightly to ensure the surface blends seamlessly with the rest of the floor. Wipe away any dust with a damp cloth.
Step-by-Step Guide to Repairing Dents
Step 1: Clean the Affected Area
As with scratches, start by cleaning the dented area thoroughly to remove any dirt or debris.
Step 2: Apply Heat
For minor dents, apply heat using a heat gun or hairdryer. Warm the area around the dent to make the vinyl more flexible. Use a putty knife or a similar tool to gently lift and press the vinyl back into its original shape. Be cautious with the amount of heat to avoid causing further damage.
Step 3: Fill the Dent
If the dent is more severe and cannot be fixed with heat alone, you may need to fill it. Use a vinyl floor repair kit to fill the dent with putty or a suitable filler. Smooth the surface with a putty knife and allow it to dry completely.
Step 4: Sand and Smooth
Once the filler has dried, use fine-grit sandpaper to smooth the repaired area. Ensure the surface is even and blends well with the surrounding flooring. Clean the area with a damp cloth to remove any sanding residue.
Replacing Damaged Vinyl Tiles or Planks
In some cases, scratches and dents may be too severe to repair, and replacing the damaged tiles or planks may be the best option. Here’s how to do it:
Step 1: Remove the Damaged Tile or Plank
Use a utility knife to cut around the edges of the damaged tile or plank. Carefully lift and remove it from the floor. If the tile or plank is glued down, you may need to use a heat gun to soften the adhesive.
Step 2: Prepare the Area
Clean the exposed area thoroughly. Remove any remaining adhesive or debris to ensure a smooth surface for the replacement tile or plank.
Step 3: Install the New Tile or Plank
Apply adhesive to the back of the new tile or plank. Carefully place it in the exposed area, ensuring it aligns with the surrounding flooring. Press down firmly to secure it in place. Use a roller to smooth out any air bubbles and ensure proper adhesion.
Step 4: Allow to Set
Allow the adhesive to set according to the manufacturer’s instructions. Avoid walking on the repaired area until it is fully set to prevent any displacement.
Preventing Future Damage
Preventing scratches and dents in vinyl flooring is easier than repairing them. Here are some tips to keep your floors looking pristine:
Use Furniture Pads: Place felt pads or furniture coasters under the legs of heavy furniture to prevent scratches when moving them.
Trim Pet Nails: Regularly trim your pet’s nails to reduce the risk of scratches.
Use Rugs and Mats: Place rugs or mats in high-traffic areas to protect the flooring from wear and tear.
Avoid High Heels: Encourage guests to remove high-heeled shoes before walking on vinyl floors to prevent dents and scratches.
Clean Regularly: Regularly clean your vinyl floors to remove dirt and debris that can cause scratches over time.
Conclusion
Repairing scratches and dents in vinyl flooring can extend the life of your floors and maintain their appearance. By following the steps outlined in this guide, you can effectively address minor imperfections and even replace damaged tiles or planks when necessary. Remember, regular maintenance and preventive measures are key to keeping your vinyl flooring in top condition.
With these tips and techniques, you can enjoy the beauty and durability of your vinyl floors for years to come. Whether you’re dealing with minor scratches or significant dents, the right approach can make all the difference. Happy repairing!